Overview
Installation
Connection
Configuration
Export an expense
Overview
This guide is intended for users who already use Pleo–Business Central integration. If you're new to the Pleo–Business Central integration, please refer to the set-up guide to get started with connecting Business Central to Pleo.
If you don’t have the SUPER permission, ask a Business Central SUPER user to:
- Install the integration for you
- Assign PLEOINTADMIN to your user account
- In Business Central, access Users name (User > User Name column)
- In User Permission Sets, add PLEOINTADMIN
- Leave the Company field empty to enable this permission set on all companies (recommended for multi-company setups)
- Grant PLEOINTADMIN to all other relevant users who will use the integration
How to check user permissions in Business Central?
- In Business Central, access Users page
- Under the User Name column, click on your user name
- In the User Permission Sets section, you can see Permission Sets assigned to this User

Installation
Download your accounting settings from Pleo
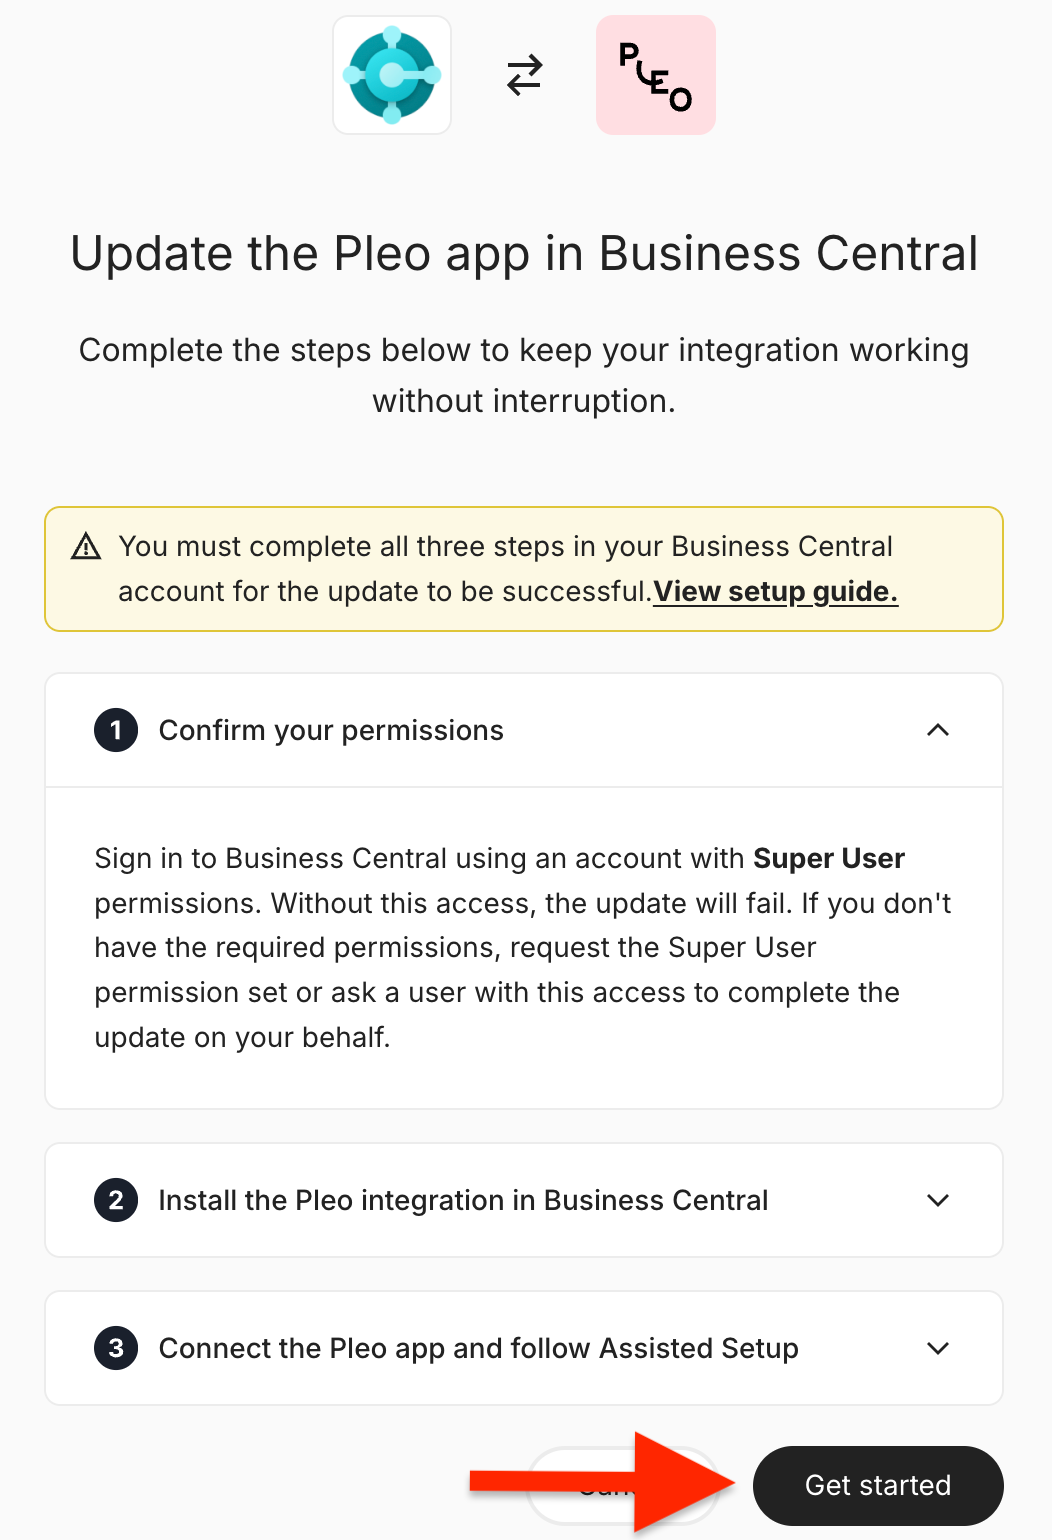
- In Pleo, click Get started
- Select Download
- Store this file securely for future use in Configuration step
Install the app
- Go to the Pleo app in Microsoft AppSource
- Click Get it Now
- Use your Business Central credentials to sign in (if required)
- Select the Business Central environment into which you want to install the app
Note: Make sure this matches the environment used for your existing integration.
Click Install
Once installed, the Integration Setup page opens in the same tab
Connection
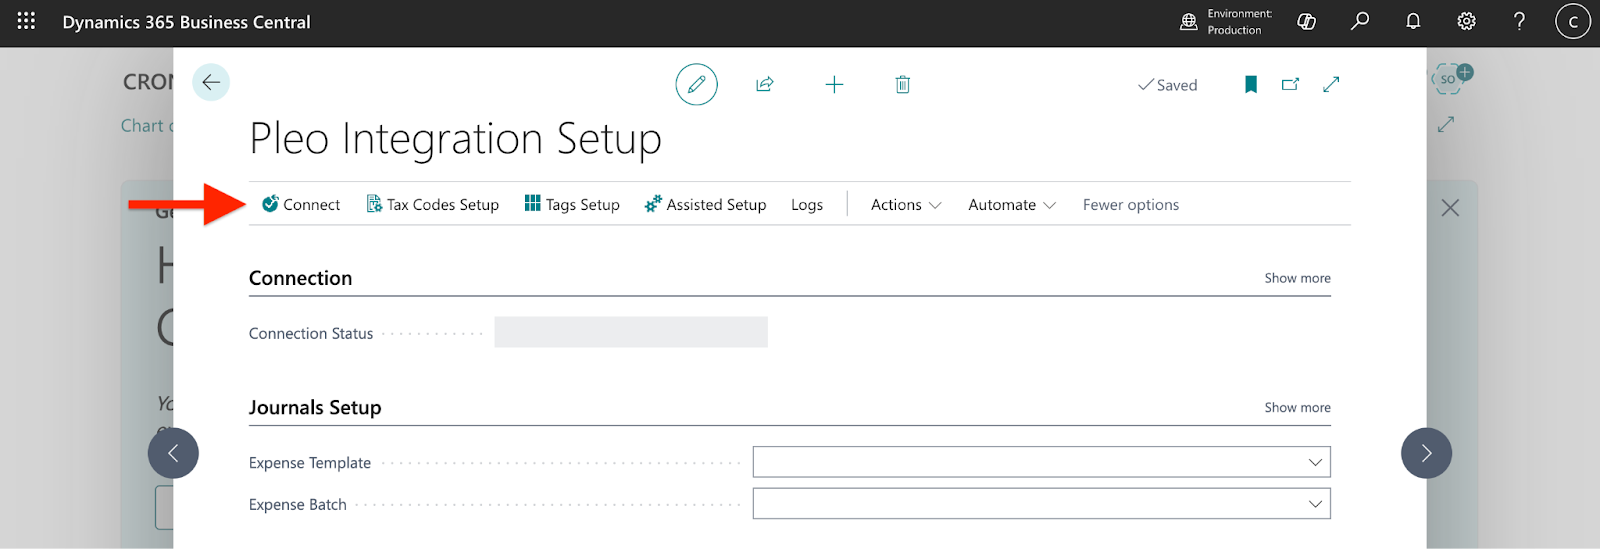
Connect Business Central to Pleo
- In Business Central, open Pleo integration setup
- Click on the pencil icon to edit
- Click Connect
Select Entity and Authorisation
- Select the correct Pleo entity
- Click Allow
- Follow the on-screen instructions
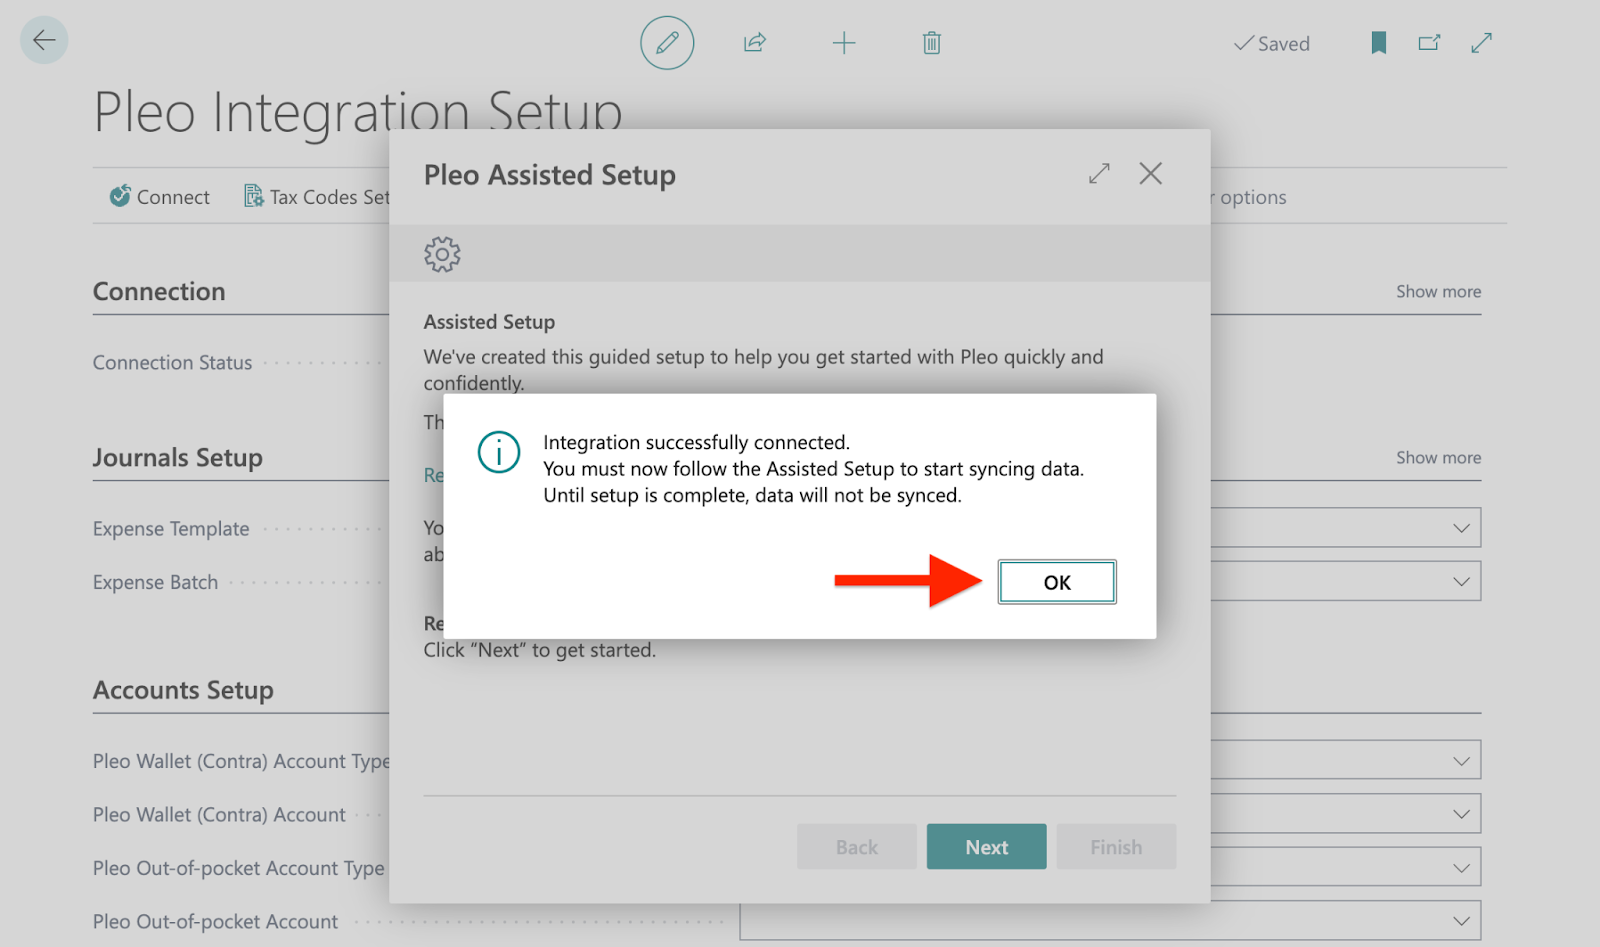
- Once the connection is complete, click OK
Configuration
In this step, you’ll use the Assisted Setup in Business Central to configure the new integration.
- In Business Central, open Pleo integration setup
- Locate the Assisted Setup
- Click Next to proceed
- Follow the instructions
Accounting setup
- Expense Journal
- Assign the Expense Journal from the downloaded accounting settings file to the Expense Template and Batch
- Pleo Wallet (Contra) Account
- Assign Pleo Wallet (Contra) Account from downloaded accounting settings
- Alternatively, if you want to have Pleo Wallet as a Bank Account:
- Select Bank Account as Type
- Create and map a new Bank Account directed in the Assisted Setup screen
- Pleo Out-of-pocket & External Reimbursements Accounts
- Assign accounts from downloaded accounting settings (if available)
- Default Vendor Account
- Create and map a new Vendor account directed in the Assisted Setup screen
Dimensions, Pleo Teams and Chart of Accounts
- Select the dimensions you want to synchronise
- Click Sync With Pleo
- Link Pleo Teams to a Dimension (optional)
- Select a Dimension you want to link to Pleo Teams
- Follow the additional steps to complete the setup
- Click Sync With Pleo to synchronise Business Central Chart of Accounts with Pleo
Contra Account, Tax Codes & Categories
- In Pleo, navigate to Settings
- Click Accounting
- Access Contra Accounts
- Assign the Contra Account in Pleo following the instructions in Assisted Setup
- Once complete, access Categories
- For each category
- Select the account for each category
- Choose a tax code from the dropdown
- Expense Journal
- Close the Assisted Setup to finalise configuration
Export an expense
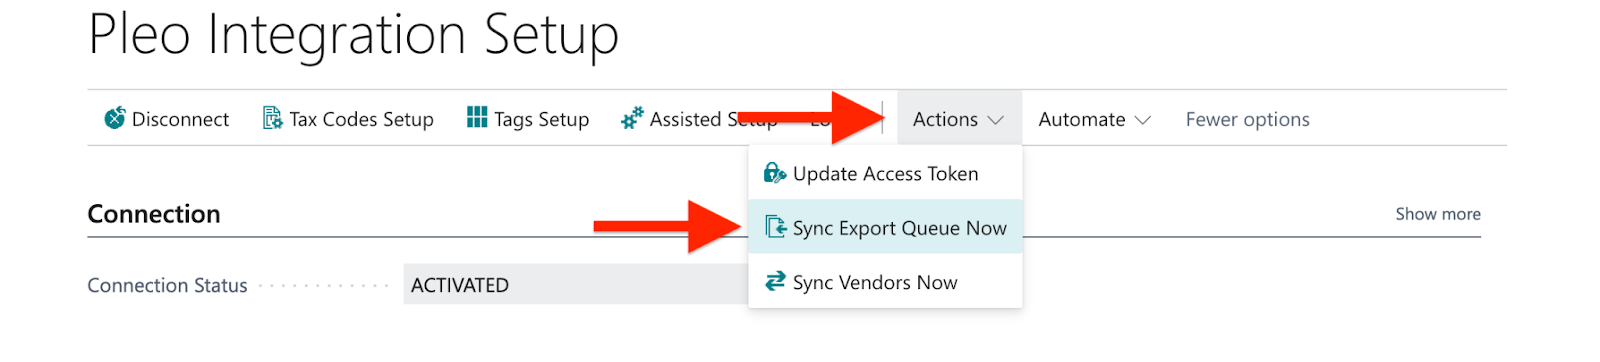
How to trigger the exporting process instantly?
- In Business Central, open Pleo Integration Setup
- Under more option, access Actions
- Click Sync Export Queue Now
Was this article helpful?
That’s Great!
Thank you for your feedback
Sorry! We couldn't be helpful
Thank you for your feedback
Feedback sent
We appreciate your effort and will try to fix the article
Need more help? Contact us.
Login and click the ? in the bottom right corner to chat with us. Having issues logging in? Find out why you are unable to log in.
