Preparation
Connection
Configuration
Export an expense
Step 1. Preparation
Activate services in DATEV
Your accountant or DATEV administrator:
- In DATEV
- Go to Verwaltung → Rechteverwaltung online → Mandanten
- Activate the following services:
- Rechnungsdatenservice 1.0
Makes it possible to connect DATEV with other apps and transfer data securely - Kassenbuch online
Allows you to manage expense records in Datev Unternehman Online
Set up accounts
Your tax consultant should provide you with the account numbers.
| Account | Description | Account type |
| Pleo | For expenses paid with Pleo cards, or directly from your Pleo balance. | Typically a bank account. |
Out-of-pocket | For money owed to employees (or by employees). | Typically an other liabilities account. |
| Reimbursements | For reimbursements of money owed to employees (or by employees). | Typically a transition account. |
| Invoices (optional) | For invoice payments made from the Pleo Account (to be matched with vendors in DATEV). | Typically a transition account. |
Create new cash ledgers in DATEV
You’ll need to create 2 new cash ledgers for your Pleo expenses.
- Go to DATEV → Anwendungen → Kassenbuch → Kasse anlegen.
- Create a cash ledger for:
- Pleo expenses
- Out-of-pocket expenses
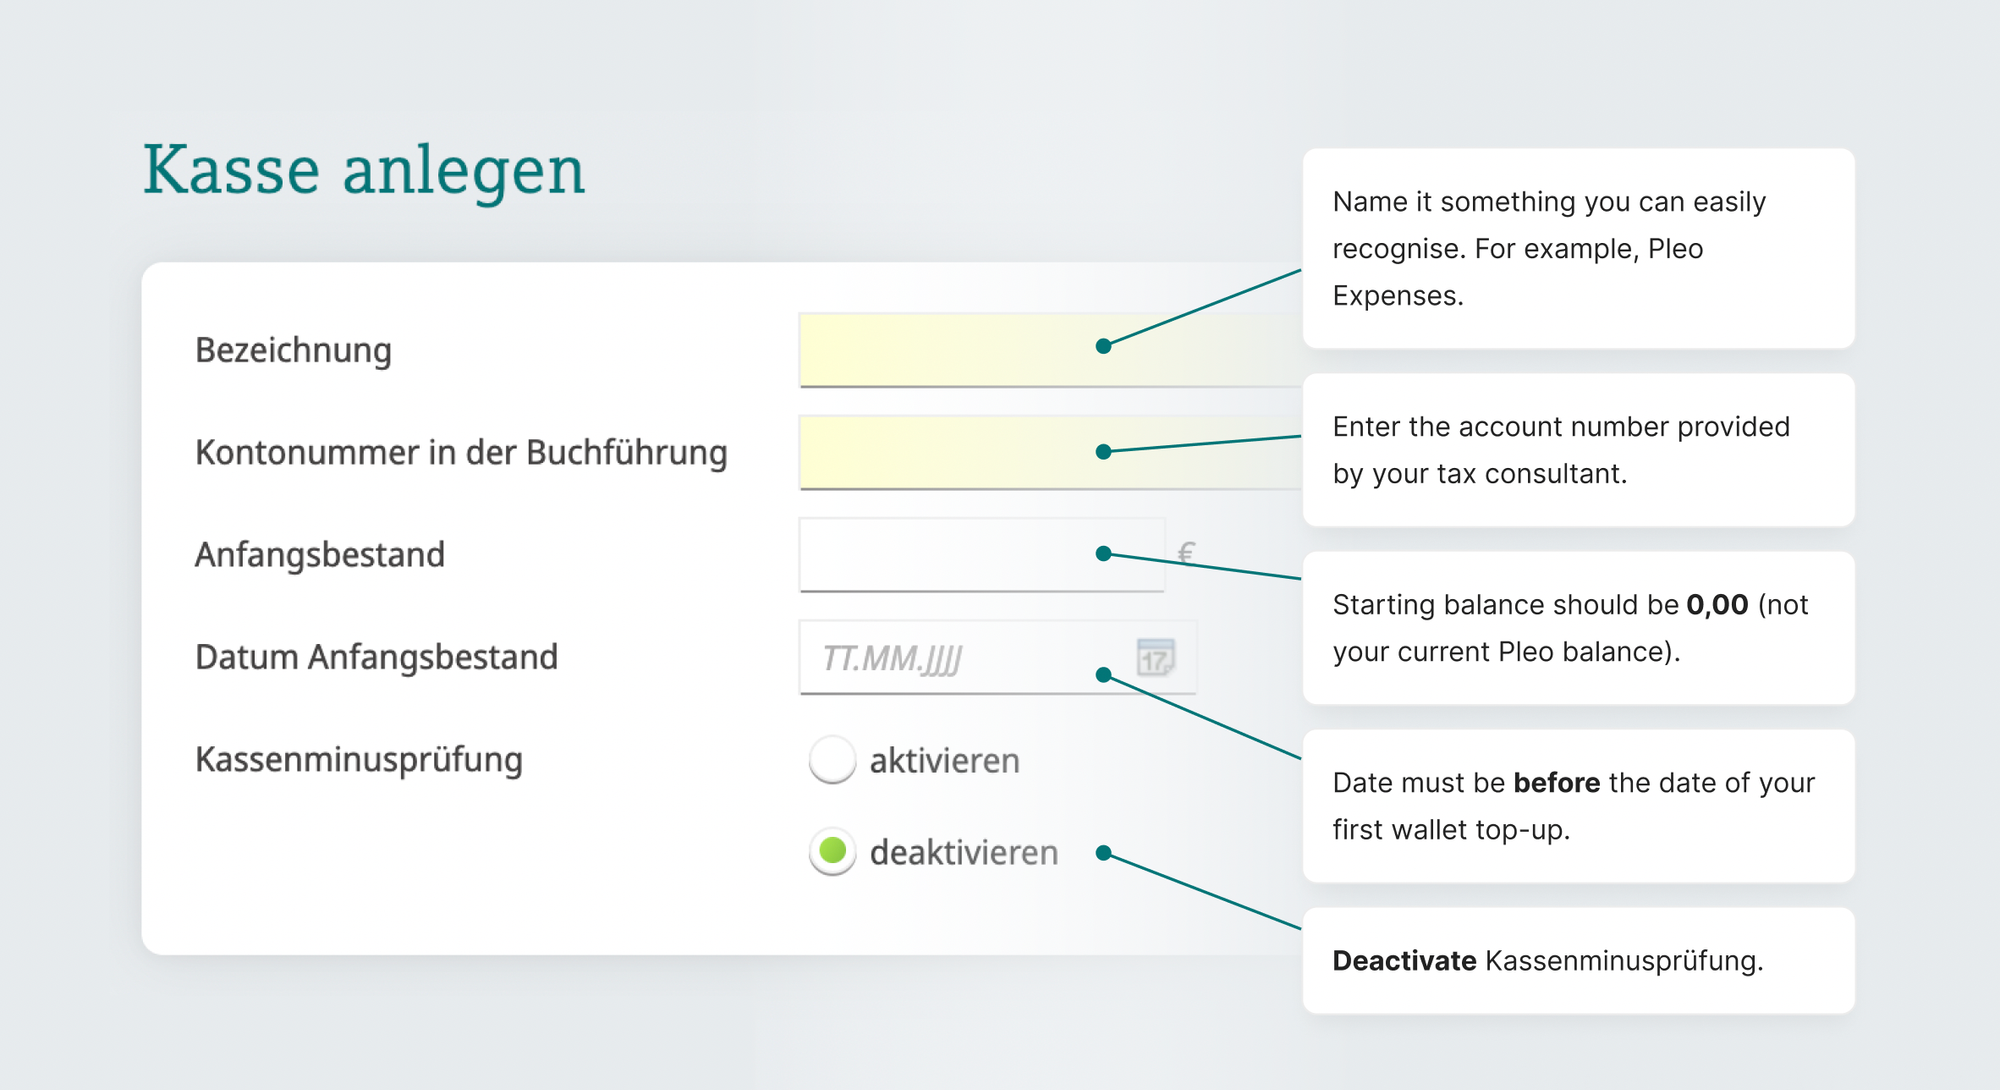
Good to know: You’ll need access to Kassenbuch Online. Ask your DATEV admin to update your permissions if necessary.
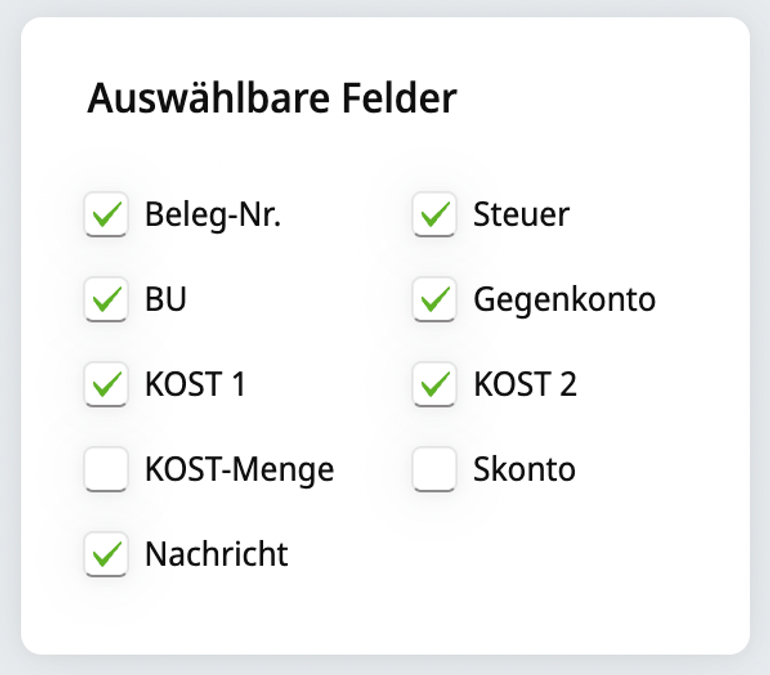
Apply settings
To display all your Pleo data in DATEV, you’ll need to update your settings.
- In DATEV, go to Einstellungen → Erfassungsmaske konfigurieren.
- Check the following boxes:
Step 2. Connection
- In Pleo, navigate to Settings
- Click Accounting
- Search for DATEV
- Select the DATEV Unternehmen online and click Continue
- Follow the prompts
Step 3. Configuration
1. Configure tags (cost centres)
Tags in Pleo reflect Kostenstellen / cost centres (KOST1 and KOST2) in DATEV.
- In the Pleo, go to Settings
- Click Accounting
- Select Tags
- Click Add tag group
Please note that you can have up to three tag groups in Pleo. - Input an easily understandable name and select the tag group as either KOST1 or KOST2.
- Click Create tag group
2. Set up Categories
- In the Pleo, go to Settings
- Click Accounting
- Select Categories
- Category groups have automatically populated - edit them by clicking on the title Create categories under each category group
For example, under a "Marketing" category group, categories could be "Facebook" and "Google." - Assign a tax code to a specific category so that any future expenses under that category are automatically assigned the relevant tax percentage
Step 4. Export an expense
After setting up the integrations it's important to export an expense to see if the integration is configured correctly.
Once you've exported expenses from Pleo, open DATEV Unternehmen online and:
- Log into DUO and click on the relevant contra account (kassenbuch)
- Click on Cash movements (German: Kassenbewegungen)
- Select the accounting month
- Click on the details of the expenses
- Check through to make sure all of the Pleo expense info looks fine
- If all looks good, click on Commit & Provide (German: Festschreiben & Bereitstellen) to save the Pleo expense info in DATEV.
Was this article helpful?
That’s Great!
Thank you for your feedback
Sorry! We couldn't be helpful
Thank you for your feedback
Feedback sent
We appreciate your effort and will try to fix the article
Need more help? Contact us.
Login and click the ? in the bottom right corner to chat with us. Having issues logging in? Find out why you are unable to log in.
